
How to Use a Wood Chipper: Simple Steps, Tips and Mistakes to Avoid
Disclosure: We may earn a commission when you buy through links on this page, at no extra cost to you. As an Amazon Associate I earn from qualifying purchases. Learn more

Learn how to use a wood chipper safely: gear, setup, starting, feeding technique, jams, cleaning and storage in seven steps.
To use a wood chipper, put on safety glasses, hearing protection, gloves and snug clothing, set the machine on flat ground, check that the hopper and chute are clear, start it with the feed area empty, then feed branches butt end first, one at a time, and let the blades pull them in. Never push material in with your hands, and shut the machine down fully before clearing a jam. That is how to use a wood chipper safely in a nutshell.
A chipper turns piles of pruned branches into useful mulch in minutes, but it is also one of the most dangerous tools in the yard. The good news is that a careful routine makes the job safe and efficient. The steps below cover everything from preparation to storage, for both small electric chipper shredders and larger gas machines.
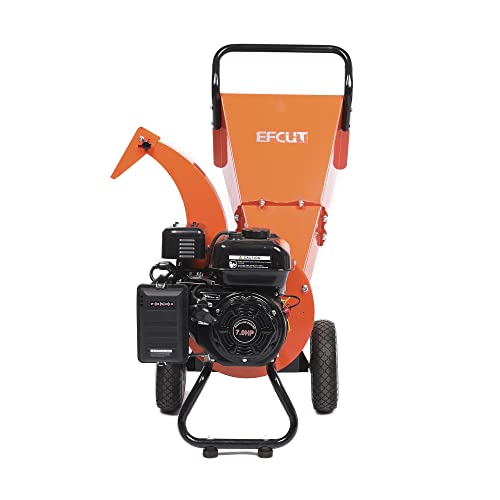
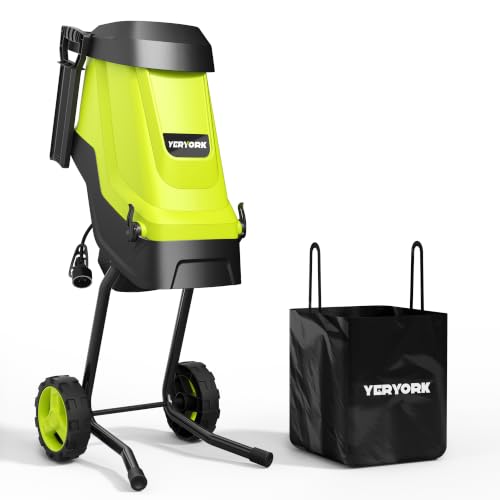
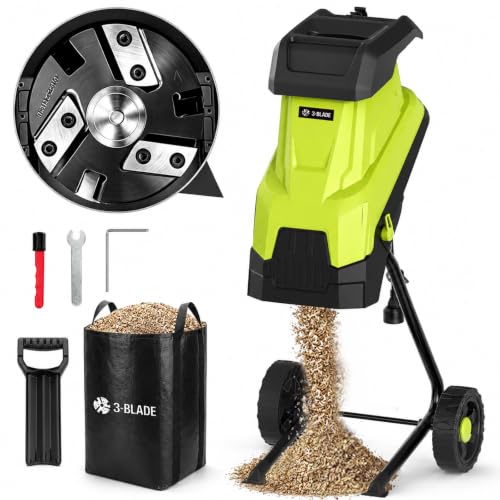
Before You Start: Safety and Prep
Gear up first. Wear safety glasses or a face shield, hearing protection, heavy work gloves without loose cuffs, sturdy boots and close fitting clothes. Remove jewelry, tie back long hair and avoid loose sleeves, scarves or drawstrings that could catch on a branch and be pulled toward the blades.
Set up the work area. Place the chipper on firm, level ground, away from people, pets, cars and windows, and point the discharge chute where flying chips will not cause harm. Keep children and bystanders well back. Stack the branches on one side so you can reach them without walking in front of the chute.
Sort your yard waste. Check the machine's branch capacity and set aside anything thicker. Remove stones, nails, wire, dirt clods and other foreign objects, which can damage blades or be thrown out at speed. Many makers also warn against feeding roots, vines, palm fronds, bamboo, frozen branches or very dry hay, which can jam or wrap around the rotor. Read the manual for your model's list.
Plan the session as well. Have a rake, a tarp or a wheelbarrow nearby for the chips, a push stick within reach and a clear path to the stop switch. If you are working alone on a larger gas machine, tell someone nearby what you are doing. Chipping in the cooler part of the day makes the work easier on you and the engine.
How to Use a Wood Chipper Step by Step
Follow these steps every time you chip, whether you are clearing a few hedge trimmings or a full storm cleanup.
Step 1: Read the manual and wear safety gear
The manual shows where the on and off switch, emergency stop, throttle, choke, hopper lock and reset button are. Learn them before the machine is running. Put on all your safety gear now, including hearing protection. Gas chippers are loud, and even electric shredders produce a sharp, high noise when they chew branches.
Step 2: Plug in or fuel up correctly
For electric chippers, use a heavy gauge outdoor extension cord rated for the motor's amperage, plugged into a GFCI protected outlet, and keep the cord behind you and away from the discharge. Most gas chipper shredders use a four stroke engine, so do not mix oil into the fuel. Fill the tank with fresh unleaded gasoline outdoors with the engine cold, and check the separate engine oil level. Many machines ship without oil, so fill it to the mark before the first start. A few cordless garden shredders use batteries, which should be fully charged.
Step 3: Inspect the tool before each use
Walk around the machine. Make sure the hopper, chute and covers are closed and locked, the blades are sharp and tight and nothing is lodged inside from the last session. Check the wheels, tow bar and frame bolts on larger machines, and look for fuel or oil leaks. Damaged guards or a cracked hopper mean the machine should not be used until repaired.
On electric models, inspect the plug and the cord along its full length. On gas models, check the air filter and look at the drive belt, if your chipper has one, for cracks or glazing. A quick five minute check before each session catches most problems while they are still cheap to fix.
Step 4: Start it the right way
Make sure the hopper is empty and your hands are clear. On electric models, switch on and let the motor reach full speed. On gas models, set the choke and throttle as the manual directs, pull the recoil cord or press the electric start and let the engine warm up for a minute before moving the throttle to full. Always feed at full speed, since slow blades jam more easily.
Step 5: Use proper technique and stance
Stand slightly to the side of the feed chute, not directly in front of it, with solid footing. Feed branches butt end first, one at a time, and let the blades draw them in. Let go as soon as the machine grabs the branch. If a branch has side shoots, trim them or fold them so the branch enters cleanly.
Never reach into the hopper. Push short pieces in with the next branch or a wooden push stick, never with your hand or foot. Mix green and dry material, and feed leaves and soft debris into the shredder hopper, not the branch chute. If the engine or motor slows, pause and let it recover before feeding more. Empty the collection bag before it is full, since a packed bag can back up and cause jams.
If the machine does jam, do not keep forcing more material in or yank the stuck branch out while the blades are turning. Switch it off, wait for every moving part to stop, disconnect the power and only then open the access cover to clear the blockage. Then check the blades for damage before restarting.
Step 6: Shut down, cool down and clean
When you finish, run the machine for a few seconds to clear the last chips, then switch it off and wait for the blades to stop completely. Unplug electric models or disconnect the spark plug wire on gas models before you clear a jam, open a cover or touch the blades. Let the engine cool. Brush chips and sap off the housing, hopper and chute, and empty the bag.
Step 7: Store it correctly
Store the chipper in a dry garage or shed, or under a fitted cover. For gas models stored longer than a month, add fuel stabilizer or run the tank dry, and change the oil per the manual. Keep electric models and cords indoors away from moisture. Check blades before storage, and sharpen, flip or replace them so the machine is ready next season.
Pro Tips for Better Results
Chip fresh. Green branches cut much more easily than dry, hard wood, which dulls blades faster. Process prunings within a few days when you can.
Feed at a steady pace. Overloading the chute stalls the machine, while a smooth rhythm keeps the blades at speed and gives a finer, more even chip. Alternate thicker branches with lighter material to keep the machine working efficiently.
Keep blades sharp. Sharp blades cut cleanly and pull material in on their own, while dull blades chew and jam. Many small electric chippers use reversible blades you can flip once before replacing.
Know your reduction ratio. Machines with higher ratios produce finer mulch and fill fewer bags. Spread the chips under shrubs, on paths or in the compost pile. If you are learning how to use a garden shredder for soft cuttings and leaves, the same rules apply: dry material, a steady feed and a clear bag.
Common Mistakes to Avoid
Feeding branches larger than the rated capacity is the most common mistake. It stalls the motor, overheats electric models and can damage blades or belts.
Reaching into the hopper or chute while the machine is running is the most dangerous. Always stop the machine and disconnect power before clearing anything.
Other mistakes include standing in front of the feed chute, wearing gloves with loose cuffs, feeding wet leaves into a chipper chute, ignoring strange noises or vibration and running a gas chipper without checking the oil. Avoid chipping near people or windows, and never let children help feed the machine.
Frequently Asked Questions
How often should I use a wood chipper?
Use a wood chipper whenever branches and prunings pile up, which for most homeowners means a few sessions a year after spring and fall pruning or storms. Chipping soon after cutting is easier, because green wood chips more cleanly. Regular use also keeps the engine healthy, as long as you maintain it.
Can beginners use a wood chipper safely?
Yes, if they respect the machine. Read the manual, wear full safety gear, start with small branches on a compact electric model and never reach into the hopper. Learn the stop and emergency controls first. Many beginners start by renting or buying a small electric chipper before moving to a gas machine.
Final Thoughts
Knowing how to use a wood chipper safely comes down to preparation, the right gear and a careful feeding technique: butt end first, one branch at a time and hands always clear. Shut it down fully before clearing jams, and clean and store it well. When you are ready to buy, see our picks for the best wood chipper, the best wood chipper for trees and the best wood chipper for heavy duty use. You can also read is a wood chipper worth it and our guide on where to buy a wood chipper.


